How to Manage a Multi-Room Interior Painting Project Without It Becoming a Headache
Table of Contents
Planning a project? See Interior Painting in Nashville, TN for free, fixed-price quotes from Those Guys Painting Co.
Multi-room interior repaints are the most common residential painting project — and the most common source of customer frustration when they don't go well. Not because the painting itself is difficult, but because the coordination involved across multiple surfaces, rooms, and days creates many opportunities for things to fall through the cracks.
For most homeowners the biggest stress isn't the cost. It's the uncertainty: how long the house will be torn up, what you're supposed to do before the crew shows up, and what happens if you change your mind halfway through. This guide walks through a well-run interior project from start to finish — before the painters arrive, choosing the right paint, sequencing the rooms, living in the house while the work happens, and the final walkthrough — so you know what a good outcome looks like and how to get it.

What a Well-Managed Multi-Room Job Looks Like
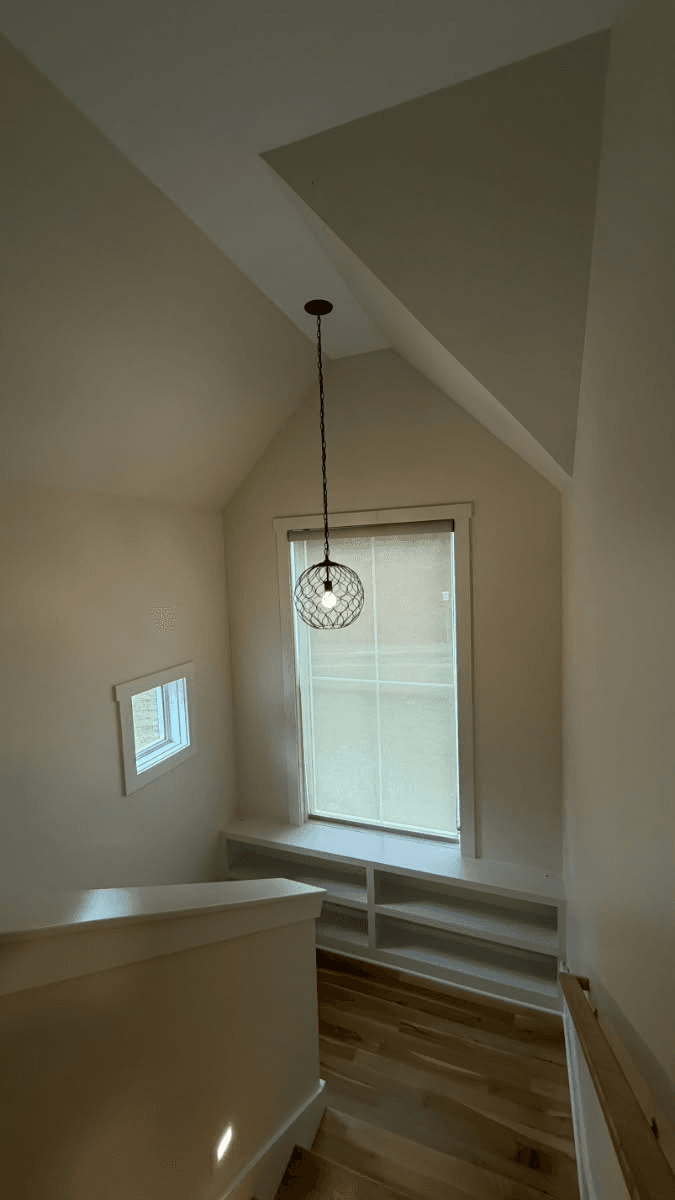
Here's a real example. A job of ours in East Nashville covered living space walls, a stairwell, a hallway, a bedroom wall, ceiling touchups, a 12×12 drywall repair in a closet ceiling, and a change order for additional bedroom walls — all in two days. (Read the full East Nashville case study.)
That scope required clear sequencing from the start: which areas get painted first, how the drywall repair fits into the schedule, how color matching is handled on-site, and what the process is when the customer wants to add walls mid-project. The project closed with a super happy homeowner. The closet patch was invisible. The change order walls matched the rest of the home. The two-day schedule held.
That outcome wasn't luck. It was the product of organized field execution, clear communication, and consistent standards from start to walkthrough. The rest of this guide breaks down how that works — and what you can do on your side to help.
Start With a Clear Scope and Quote
A predictable project starts before anyone opens a can of paint. The quote should spell out exactly which rooms and surfaces are included — walls, ceilings, trim, doors — along with any repairs. When the scope is pinned down upfront, there's far less room for scope creep and far less guesswork about how long the job will take.
Before you sign, ask your contractor three questions:
- How do you handle scope changes if we decide to add a room mid-project?
- How do you sequence the work across multiple rooms over multiple days?
- How do you handle repairs — specifically, what does a proper drywall patch look like versus a quick fix?
The answers will tell you a great deal about how the project will actually run. If you want a sense of budget before you start calling around, our Nashville interior painting cost guide is a good place to begin.
Before the Painters Arrive: Your Prep Checklist
Professionals should handle the real surface preparation — protection, patching, sanding, masking. But a few things on your side make the first morning go faster and keep your belongings safe.
Clear and protect the rooms
Move furniture out of the room if possible, along with valuables, wall décor, and anything breakable. Anything that stays should be grouped toward the middle of the room so the crew can cover it with drop cloths or plastic sheeting. Floors get covered too, to guard against dust and accidental spills.
Contain dust in the rest of the house
Dust is an inevitable part of patching and sanding. If you're painting multiple rooms, close doors to areas that aren't part of the job to contain dust and debris and keep the rest of the house cleaner throughout the project.
Flag the problem spots
Walk the rooms and note holes, cracks, dents, and any water-stained or damaged drywall. Small holes get spackle; larger repairs need joint compound, sanding until smooth and level, and time to dry. Kitchens and bathrooms often need a wipe-down with a mild detergent to remove grease or mildew so the paint adheres. Pointing these out early lets your painter plan for them instead of discovering them mid-job.
Sort out access and logistics
Schedule the work for a time when the rooms will be minimally used. Then give the crew clear instructions on entry points, security systems, parking, and pet arrangements.
Quick checklist:
- Remove or cover furniture and valuables
- Take down wall art and curtains
- Close off rooms that aren't being painted
- Note holes, cracks, and damaged drywall for the crew
- Plan for pets and kids during work hours
- Share access, alarm, and parking instructions
Choosing the Right Paint for Each Room
On a multi-room job, every room doesn't need the same product. Two things matter most: what the paint puts into the air, and how well it stands up to the room's daily use.
Low-VOC and zero-VOC paint for kids, pets, and sensitive lungs
That strong fresh-paint smell comes from Volatile Organic Compounds (VOCs) — carbon-containing chemicals that vaporize at room temperature and can keep off-gassing well after the walls are dry. The EPA notes that concentrations of many VOCs are consistently 2 to 10 times higher indoors than outdoors. Children, who breathe air closer to the floor, and anyone with asthma or allergies are most affected.
How to read the labels:
- Low-VOC paint generally means 50 g/L or less of VOCs for flat finishes. A real improvement over conventional paints, but not the highest standard.
- Zero-VOC paint contains less than 5 g/L. For nurseries and children's bedrooms, aim for this level.
- Don't forget the tint. A base may be zero-VOC, but the colorants added at the store can carry high VOC levels. Ask your painter to confirm the VOC content of the tinting system for your specific color.
- Look for third-party certification. GREENGUARD Gold tests for over 10,000 chemical emissions and is accepted for schools and healthcare facilities. Green Seal verifies VOC limits and also assesses performance, toxicity, and raw materials.
Pick the sheen for the traffic
- Matte/flat: best for low-traffic adult spaces and ceilings. Hard to clean.
- Eggshell/satin: the ideal compromise for living rooms, hallways, and children's bedrooms — significantly better washability than flat.
- Semi-gloss: maximum durability and water resistance. The right call for trim, baseboards, doors, kitchens, and bathrooms — the areas that see sticky hands and moisture.
If you're stuck on colors across several connected rooms, a paint color consultation can help the whole house flow together.

Sequencing the Rooms
The order of operations is where multi-room projects are won or lost.
Repairs go first. On the East Nashville job, the drywall repair had to happen early enough to dry before the finish coat went on. It was handled with rigor: a full patch, not a skim coat, with adequate dry time built into the schedule. The result was a patch that wasn't visible in the finished photos — exactly what proper repair looks like. (More on that in our drywall repair and painting service.)
Then a logical path through the house. Ceilings, walls, and trim get worked in an order that keeps the crew moving without doubling back over fresh paint, and connected spaces like stairwells and hallways are planned so color transitions land in clean places.
Two coats, with proper dry time. Most quality jobs need two coats, applied with clean cutting-in, careful rolling, and good ventilation. Modern latex paints typically need one to four hours between coats, which lets a crew keep a steady pace without sacrificing the finish.
Color matching on-site. When touchups or added walls need to blend with existing paint, the crew needs a clear method for matching, so the new work doesn't stand out against the old.
Living in the House During the Job
Most families stay home during an interior repaint. A few things make that easier:
- Keep one or two rooms off-limits to the work each day so you have somewhere to live.
- Keep kids and pets out of active rooms and away from wet paint, especially on trim and doors.
- Ventilate. Open windows where you can — another reason low- and zero-VOC products make a multi-day job far more comfortable.
- Have one channel for questions. You should know who to contact and how decisions get recorded.
When you want to add a room mid-project
It happens all the time: the first rooms look great and suddenly the bedroom next door looks tired. On the East Nashville job, the change order was communicated through the job channel, approved by the office with budget confirmation, and executed — all before a single brush hit the additional walls.
That's the right process. It protects the customer (no surprise invoice at the end), the contractor (documented approval for work outside the original scope), and the quality of the work (the crew knows exactly what's approved before starting).
The Final Walkthrough
The walkthrough is where you confirm the job is done right, and it should happen promptly — ideally while the crew can still address corrections before they pack up. Walk every room in good light, look along walls at an angle, check cut lines at ceilings and trim, and look closely at any repaired areas. We go deeper on this in why the final walkthrough is the most important step in any paint project.
Before the crew leaves, ask for clear documentation: the exact color names, product lines, and sheens used on every surface. Future touchups become simple instead of a guessing game. And ask what warranty covers the work, so you know where you stand down the road.

Planning a Multi-Room Repaint in Nashville?
A smooth interior project comes down to a clear scope, proper prep, the right products for each room, smart sequencing, and a real walkthrough at the end. Those Guys Painting Co. runs every interior project with that structure in place.
Ready to get started? See our interior painting services or get a free quote in minutes.
Frequently Asked Questions
How should I prepare my home before interior painters arrive?
Move furniture and valuables out of the rooms if you can, and group anything that stays in the middle so it can be covered. Close off rooms that aren't being painted to contain dust, point out holes, cracks or damaged drywall, and give the crew clear instructions on entry, alarms and pets. Your painter should handle the protection, patching, sanding and masking.
What is the difference between low-VOC and zero-VOC paint?
Low-VOC paint generally contains 50 g/L or less of VOCs for flat finishes, while zero-VOC paint contains less than 5 g/L. For nurseries and children's bedrooms, aim for zero-VOC, and ask your painter to confirm the VOC content of the tint, since store colorants can add VOCs to a zero-VOC base.
Which paint sheen is best for kids' rooms and hallways?
Eggshell or satin is the ideal compromise for living rooms, hallways and children's bedrooms because it washes far better than flat paint. Use semi-gloss on trim, baseboards, doors, kitchens and bathrooms, and keep matte or flat for low-traffic spaces and ceilings.
What order are rooms painted in on a multi-room project?
Repairs come first so patches have time to dry before the finish coat. From there the crew works a logical path through the house across ceilings, walls and trim, applying two coats with proper dry time and planning connected spaces like stairwells and hallways so color transitions land cleanly.
Can I add a room once the painting has already started?
Yes. The right process is a change order: the request is documented, approved with budget confirmation, and only then painted. That protects you from a surprise invoice, gives the contractor written approval for the added work, and makes sure the crew knows exactly what is approved before starting.
What should I check during the final walkthrough?
Walk every room in good light, look along walls at an angle, check cut lines at ceilings and trim, and inspect any repaired areas. Do it while the crew can still make corrections, and ask for the exact color names, product lines and sheens used on every surface for future touchups.