Kitchen Cabinet Painting in Nashville, TN
Kitchen Cabinets Are Different — Here's Why We Treat Them That Way
A kitchen cabinet paint job is not the same as painting a wall, a room, or even a piece of furniture. Kitchens are high-contact, high-humidity, high-grease environments. Every surface around a stove accumulates airborne cooking oils — even in a clean kitchen. That film is invisible, but it's there, and it will destroy adhesion if it isn't removed properly before a single coat of primer goes on.
On top of that, cabinet color choices carry more visual weight than almost any other decision in the room. The color of your cabinets sets the tone for the entire kitchen. Get it wrong and you've repainted — not transformed.
This page covers the specifics: how we approach degreasing, how to think about kitchen cabinet color, and how two-tone cabinet finishes work in practice. We serve homeowners across Nashville, Franklin, and Brentwood — if you're ready to get a number, fill out the form below — photos and a description is all we need. Fixed-price quote within 24 hours.
Degreasing: The Step Most Painters Rush Past
Kitchen grease is the number one reason painted cabinets fail prematurely. It's not visible at arm's length. It doesn't feel sticky. But cook in a kitchen regularly and the surfaces near and above the stove — and eventually throughout the whole kitchen — build up a thin, polymerized oil film that standard cleaning won't remove.
Here's what proper degreasing actually looks like:
Step 1: TSP Substitute Wash
We start with a full wash-down of every cabinet surface using a TSP (trisodium phosphate) substitute solution. TSP substitute cuts through cooking grease, soap residue, and surface oils without damaging the existing finish or leaving a residue that would interfere with primer bonding. Every door face, every box side, every interior edge gets washed — not wiped down, washed. The Painting and Decorating Contractors of America identifies surface contamination as the leading cause of coating failure — and kitchens are the worst offenders.
Step 2: Rinse and Dry
The wash has to come off clean. Any cleaner residue left on the surface can create adhesion problems just like the grease did. We rinse with clean water and allow surfaces to dry completely before moving to the next step. In Nashville's summer humidity, this means being deliberate about dry time — paint and primer don't bond well to damp wood.
Step 3: Scuff Sand
After the surface is clean and dry, we scuff-sand with 150–220 grit to open up the existing finish. This mechanical abrasion gives the primer something to grab. On cabinets with a factory finish or a heavy lacquer, this step matters as much as the cleaning — gloss surfaces repel primer the same way grease does.
Why This Matters More on Cabinets Than Anywhere Else
Wall paint that peels in two years is annoying. Cabinet paint that peels in two years means redoing the entire job — disassembly, prep, prime, spray, reassembly, all over again. The prep is where durability is built. We don't rush it.
Kitchen Cabinet Color: How to Choose What You'll Still Love in Five Years
Cabinet color is one of the most permanent-feeling decisions in a kitchen renovation, even though it's actually one of the most reversible. That psychological permanence is exactly why people overthink it — and why we try to give honest guidance rather than just validate whatever the homeowner has already decided. For a full breakdown of what kitchen cabinet painting costs and involves, see our Nashville kitchen cabinet painting guide.
White and Off-White: The Default for a Reason
White cabinets remain the single most common request we get in Nashville kitchens, and for good reason. They're bright, they work with nearly every countertop and hardware finish, and they have strong resale appeal. The variation within "white" is enormous, though — a cool bright white like Benjamin Moore White Dove reads very differently from a warm cream like Chantilly Lace or an antique white. Lighting in your specific kitchen determines which reads well. We strongly recommend testing a sample on an actual door in your kitchen before committing.
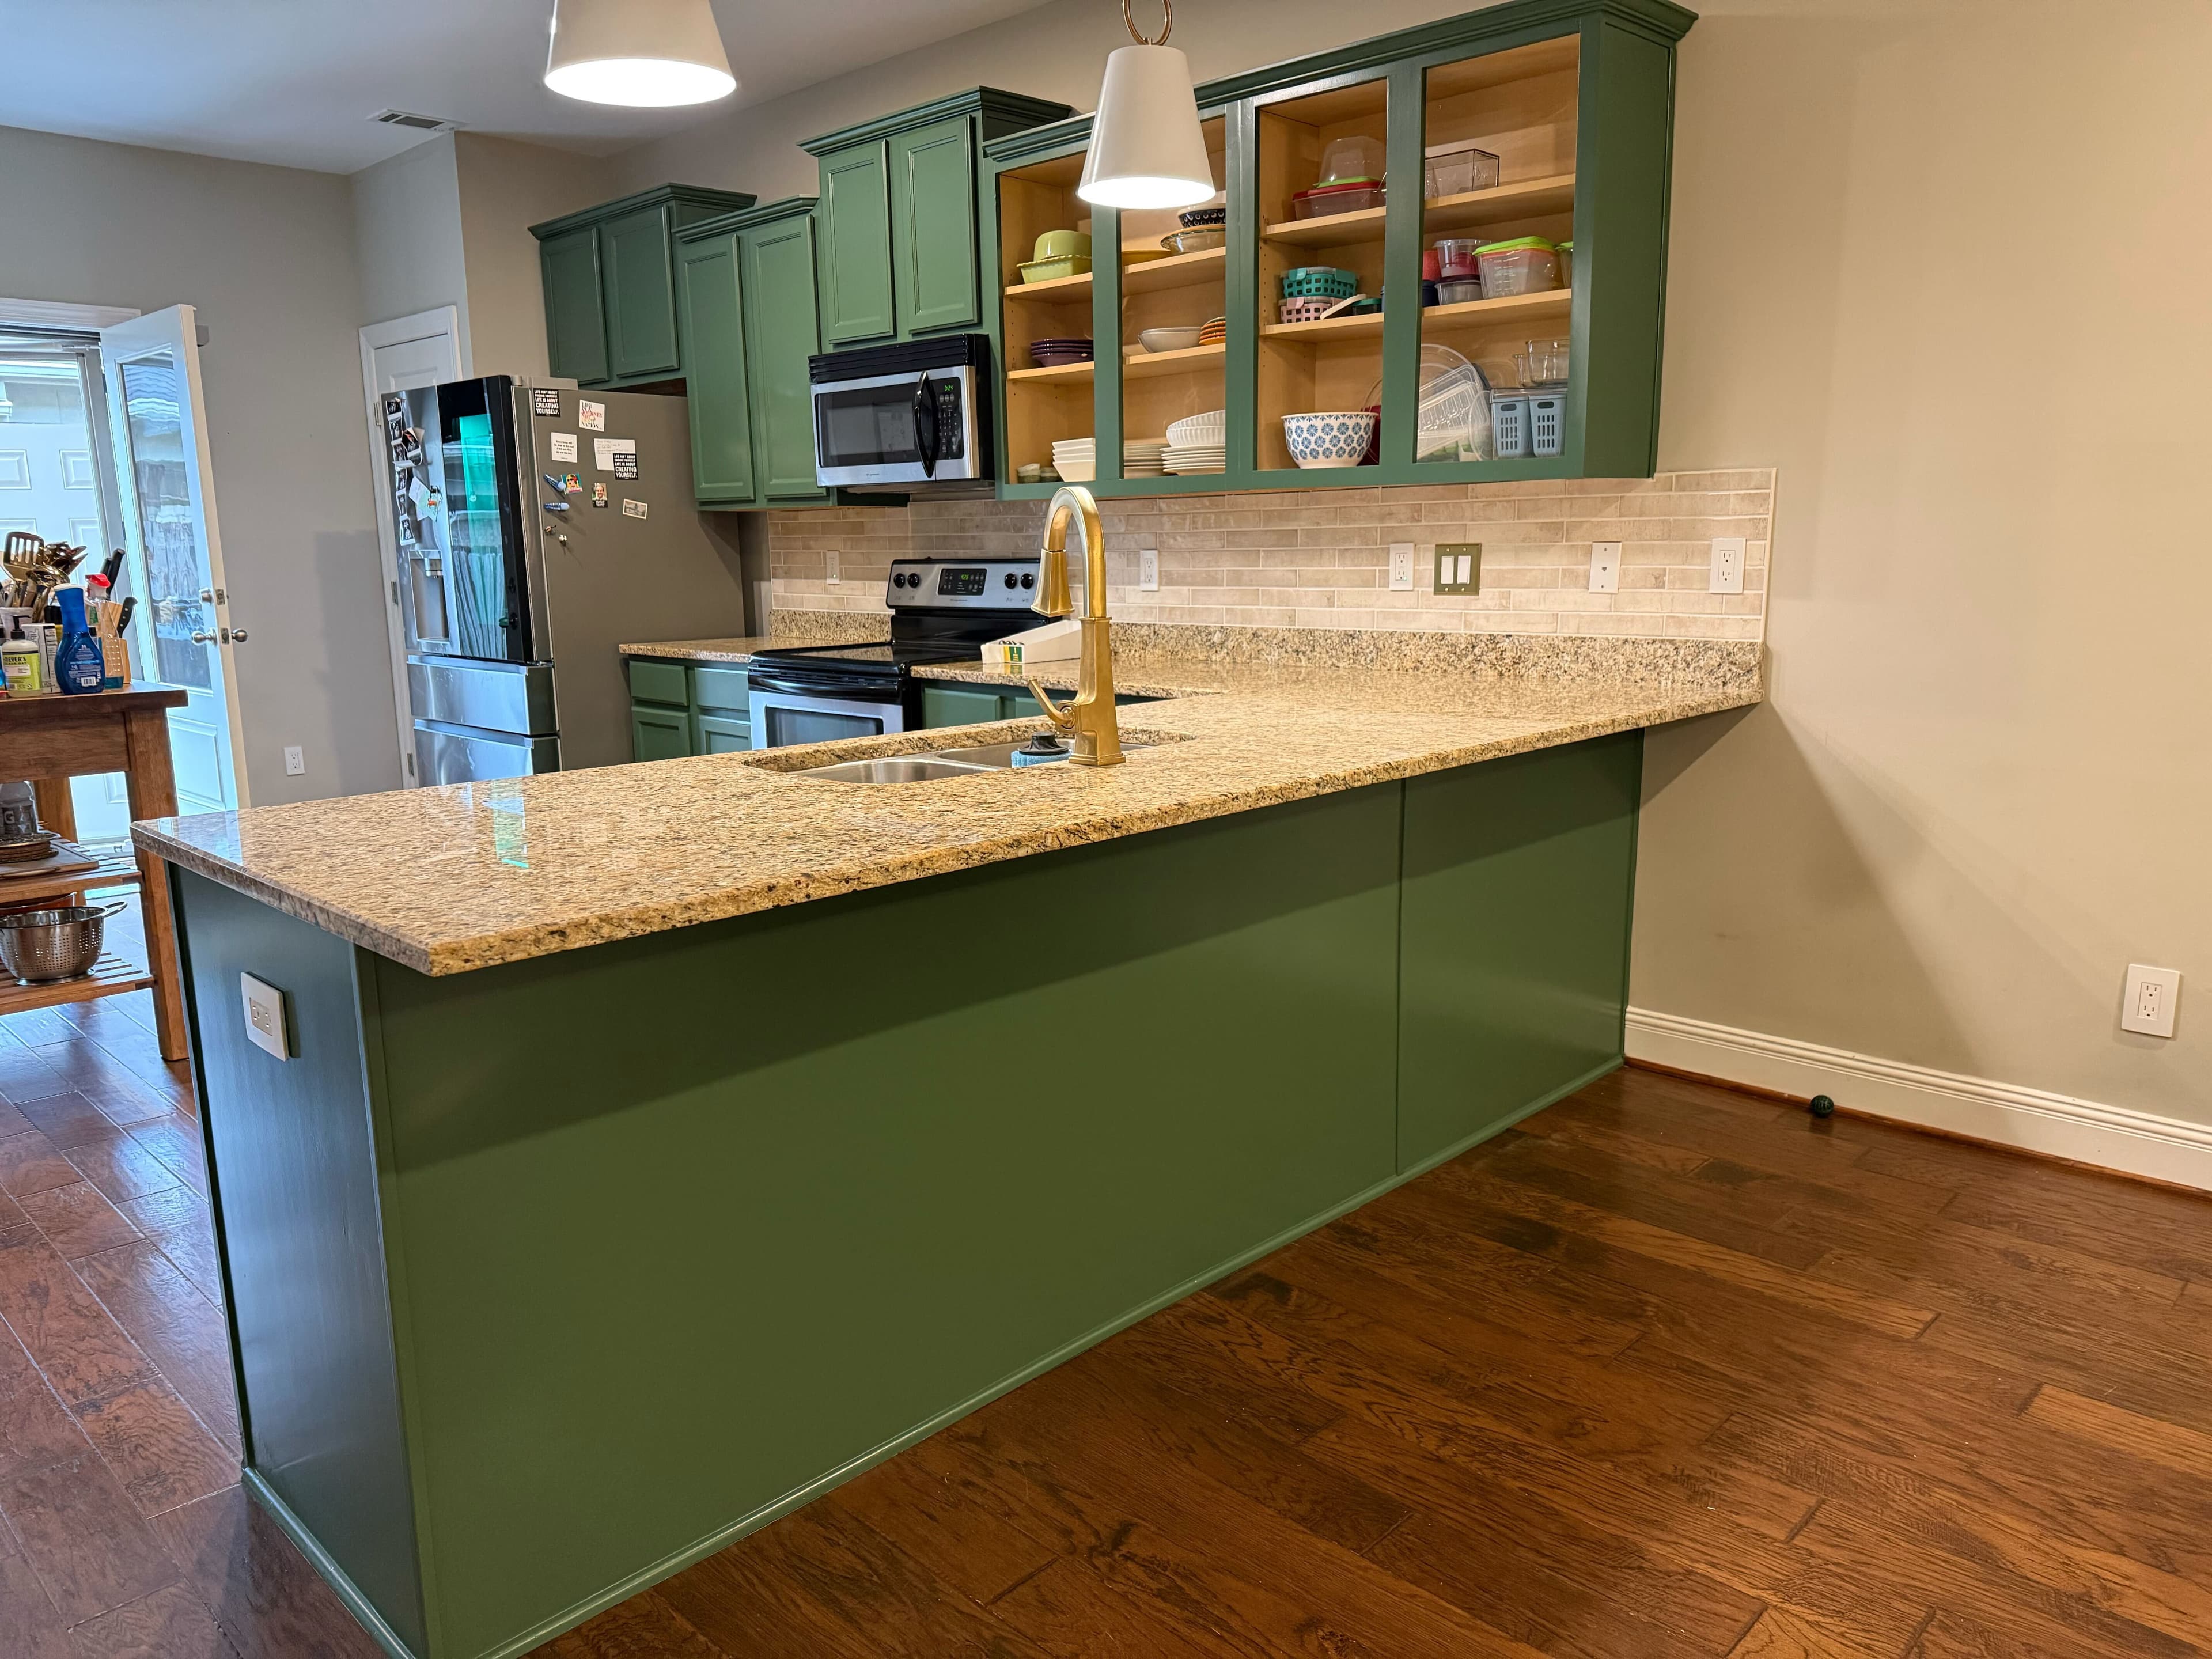
Greens, Blues, and Saturated Colors
Sage greens, navy blues, forest greens, and deep charcoals have become staples in Nashville kitchens over the last several years — and they hold up well if the color fits the kitchen's natural light and the rest of the room. A deep navy on a lower cabinet run in a bright, south-facing kitchen can be stunning. The same color in a darker, north-facing kitchen can make the room feel smaller and heavier.
Saturated colors also require more deliberate primer work. Going from a stained wood or a light finish to a dark color without the right primer sequence leads to uneven coverage and color shift as the finish ages. We account for this in how we spec the primer coat.
Neutrals: Gray, Greige, and Warm Tones
Mid-tone neutrals — warm grays, greiges, soft taupes — are a strong choice when the goal is timeless over trendy. They pair well with both warm and cool hardware finishes, photograph well for listings, and don't date as quickly as more fashion-driven colors. If you're painting cabinets primarily for resale, a neutral is almost always the right call.
Two-Tone Cabinet Finishes: What Works and What Doesn't
Two-tone cabinets — upper cabinets in one color, lower cabinets in another — are one of the more popular requests we get, and one of the more technically involved. Done well, the result is a custom, designed-looking kitchen. Done carelessly, the two colors fight each other or the transition looks arbitrary. Our cabinet painting cost and process guide covers pricing for both single-color and two-tone jobs in detail.
The Classic Approach: Light Uppers, Dark Lowers
The most reliable two-tone combination is a light or white upper cabinet paired with a darker lower. This is grounded in how kitchens work visually — uppers recede and keep the room feeling open, lowers anchor the space. White uppers with a navy, forest green, or charcoal lower is the combination we execute most often in Nashville kitchens, and it's consistently well-received.
Island as the Second Color
A common variation is painting all perimeter cabinets one color and using the island as the accent — a different color, sometimes a contrasting finish (matte vs. satin). This works particularly well in open-plan kitchens where the island is a focal point. It reads as intentional rather than indecisive, which is the key distinction in any two-tone scheme.
Two-Tone Adds Prep and Staging Time
Two-tone jobs take longer. Every transition line has to be masked precisely. The two color sets have to be sprayed and cured in separate passes to avoid bleed-through or contamination at the transition. We scope two-tone work explicitly in the quote — there's no hidden surcharge, but the timeline and price reflect the additional work accurately.
| Two-Tone Combination | Works Best When | Notes |
|---|---|---|
| White uppers / dark lowers | Any kitchen size or light level | Most versatile, strongest resale appeal |
| Neutral uppers / saturated lowers | Good natural light, strong hardware choice | Test the lower color in your specific light first |
| All perimeter + contrast island | Open floor plan, island as focal point | Island color should relate to countertop or hardware |
| Matching uppers and lowers, contrast island | Smaller kitchens, simpler palette | Least complex two-tone option to execute |
| Two different saturated colors | Very rarely — requires a designer's eye | High risk of the colors competing |
Hardware and the Color Decision
Hardware finish — brass, matte black, brushed nickel, oil-rubbed bronze — should inform cabinet color selection, not the other way around. If hardware is already selected or in place, bring photos of it when you're evaluating color samples. The wrong pairing can undercut an otherwise strong color choice. If hardware is undecided, cabinet color first, hardware second is the cleaner sequence.
What the Full Process Looks Like
Every kitchen cabinet painting job we do follows the same sequence, regardless of color or finish type:
- Disassembly — All doors, drawers, and hardware removed and labeled
- Full degrease — TSP substitute wash, rinse, complete dry time
- Scuff sand — All surfaces abraded for primer adhesion
- Spot fill — Dings, gouges, and nail holes filled and sanded flush
- Prime — Shellac or alkyd-based primer on all surfaces
- Airless spray topcoat — Two to three coats of Benjamin Moore Advance Command, with dry time between coats
- Cure — Full cure before reinstallation to protect finish at hinge points
- Reinstall and walk-through — Hardware back on, alignment checked, final inspection with you
Most kitchen cabinet projects run 5–7 days start to finish. Two-tone jobs or kitchens with significant prep work may run longer — we'll tell you upfront in the quote. If your cabinets also need new trim or molding detail work, we handle that in the same scope.
Learn more about our overall cabinet painting process, or explore color consultation if you want help narrowing down your color before committing.
Get Your Kitchen Cabinet Quote — No Visit Required
Fill out the form below with photos of your kitchen — overall layout, close-up of a door face, any areas with existing damage or heavy wear — and a brief description of what you're looking to do. Fixed-price quote within 24 hours. No appointment, no pressure, no runaround.
Related services: Cabinet Painting & Refinishing · Trim & Detail Work · Interior Painting